AWS Integration
Kubiya offers an easy-to-use integration with Amazon Web Services. This integration allows you to perform a variety of actions on AWS using Kubiya.
To complete the AWS Integration you will need to create a Role for Kubiya using the Kubiya AWS account number and enable the integration at the Kubiya CLI.
STEP 1 - Create a Role in AWS
- Login to your AWS console and navigate to the Identity and Access Management (IAM) page.
- Click on the ‘Roles’ section
-
Click “Create Role” button in the top right corner

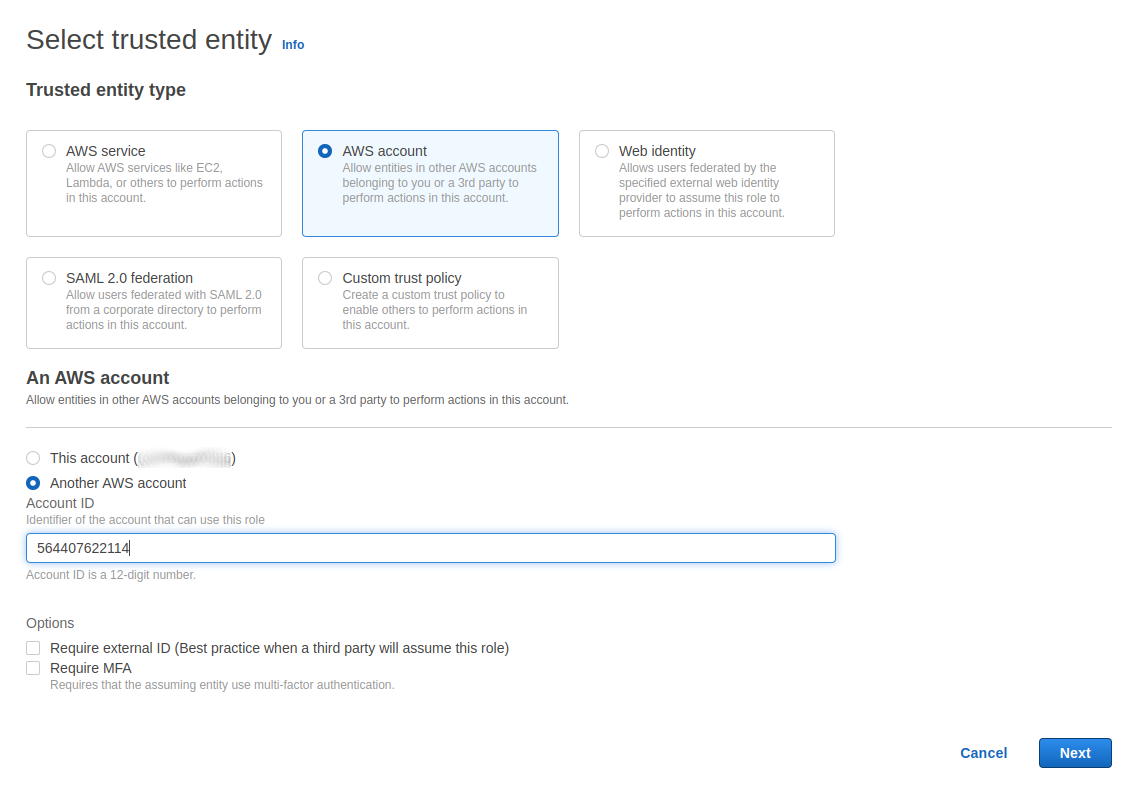
- In the “Select trusted entity” dialog:
- Select “AWS account”
- Select “Another AWS account
- Enter the Kubiya Account ID in the identifier input box 564407622114
- Click Next
-
In the ‘Policies’ dialog, select the access rules that you would like Kubiya to have access to, then click Next

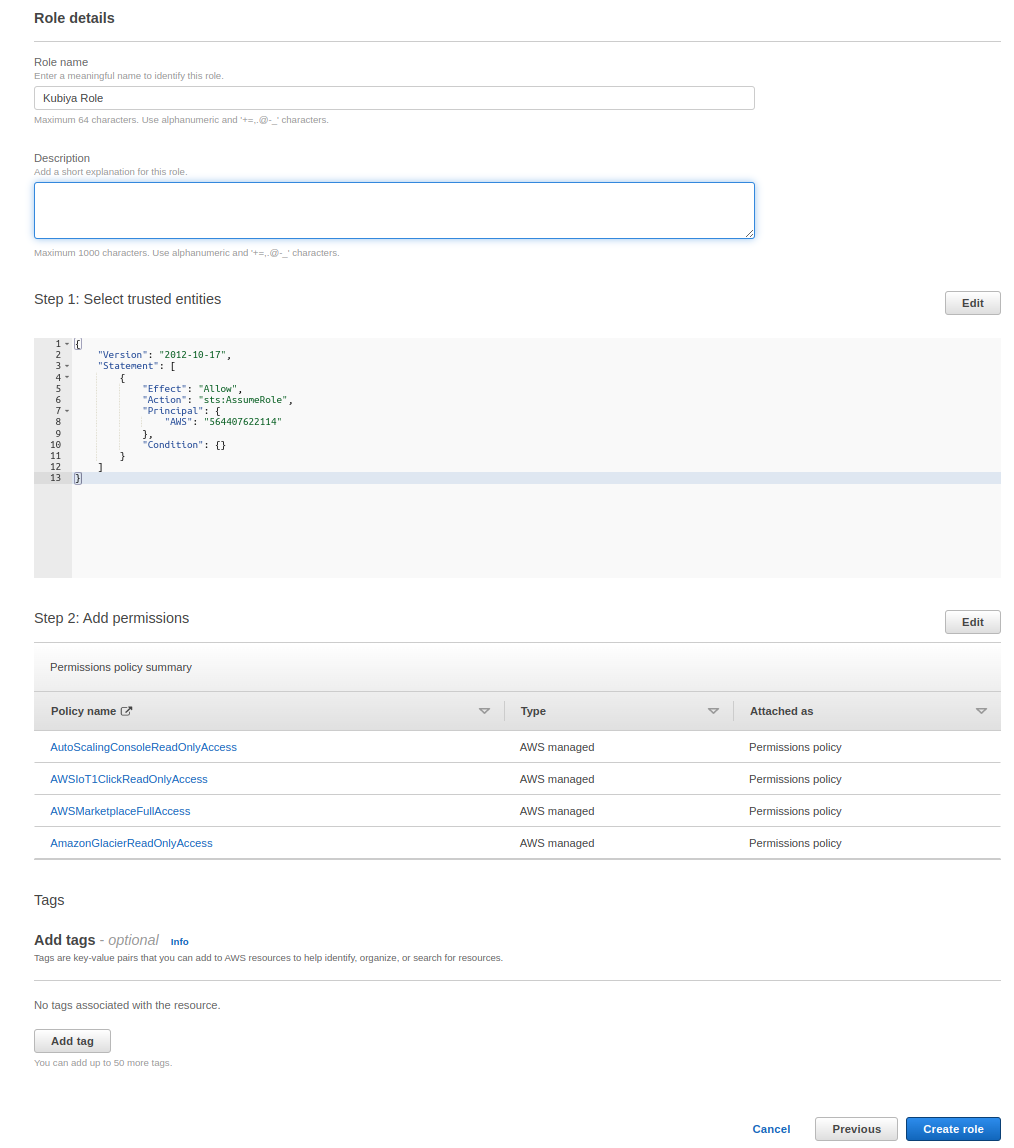
- In the “Role details” dialog:
- Name the role, you will need this later.
- Confirm the Kubiya Account ID in the JSON under “Step 1: Select trusted entities”
- Confirm the selected permissions under “Step 2: Add permissions”
- If correct, click the “Create role” button
STEP 2 - Enable AWS Integration in the Kubiya CLI
- At the command prompt issue the following command with:
- The AWS region that your Role was created in
- Your AWS Account ID
- The Role Name that you created in the steps above
kubiya integration enable -n aws -c '{"aws_region": "<aws_region>", "aws_account_id": "<your_aws_account_id>", "role_name": "<role_name>"}' -
If successful the CLI will return the following:

- If unsuccessful the CLI will return an error. Reconfirm your role configuration. If everything looks correct and the error persists contect support.